VPS 上 Docker 部署哪吒监控
status
Published
type
Post
slug
deploy-nezha-docker
date
Nov 20, 2023
tags
Tool
Docker
Config
summary
在 VPS 上使用 Docker 部署哪吒监控,需要进行预备配置,包括创建 GitHub 应用、私有仓库和个人访问凭证,还需要获取 Argo 隧道信息。然后使用 compose.yaml 文件来部署监控服务端,配置相关环境变量,并选择是否使用 gRPCwebProxy。客户端接入可以通过 gRPC 传输,无需额外配置。最后,在监控后台管理添加服务器,并通过一键安装命令将客户端与监控服务端连接。
部署预备配置
- 在 GitHub 中新建一个应用用于验证:https://github.com/settings/applications/new
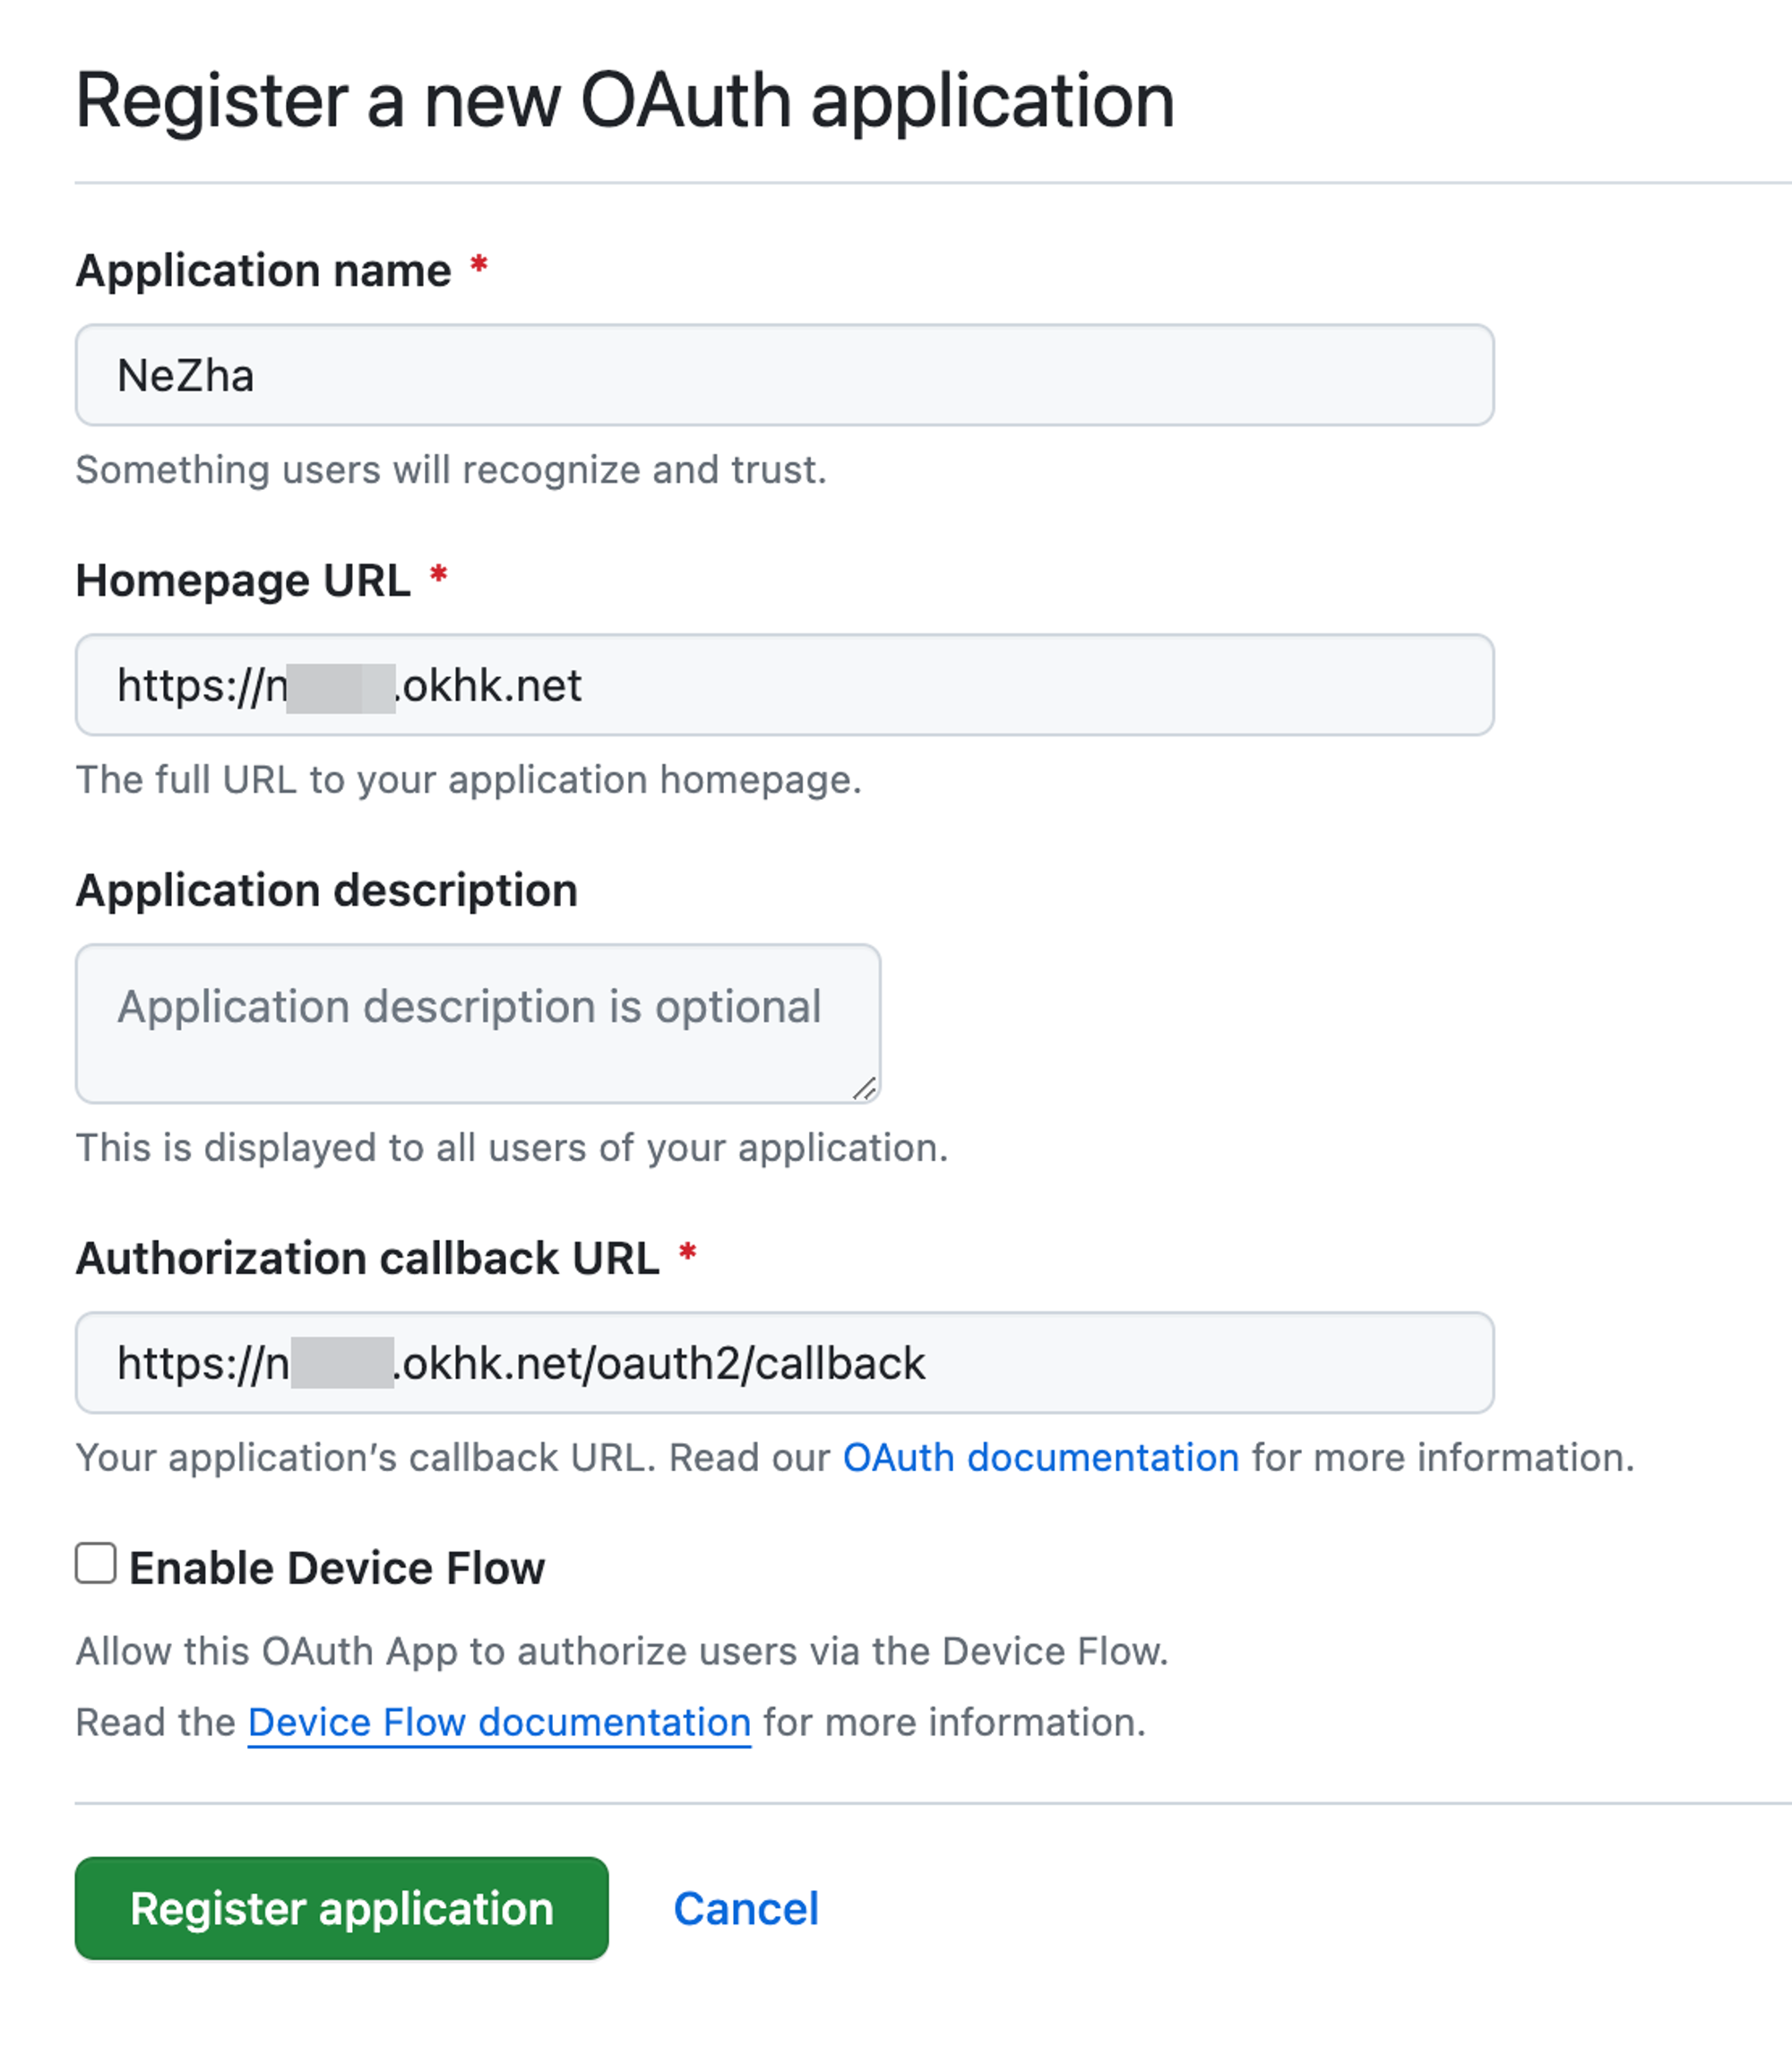
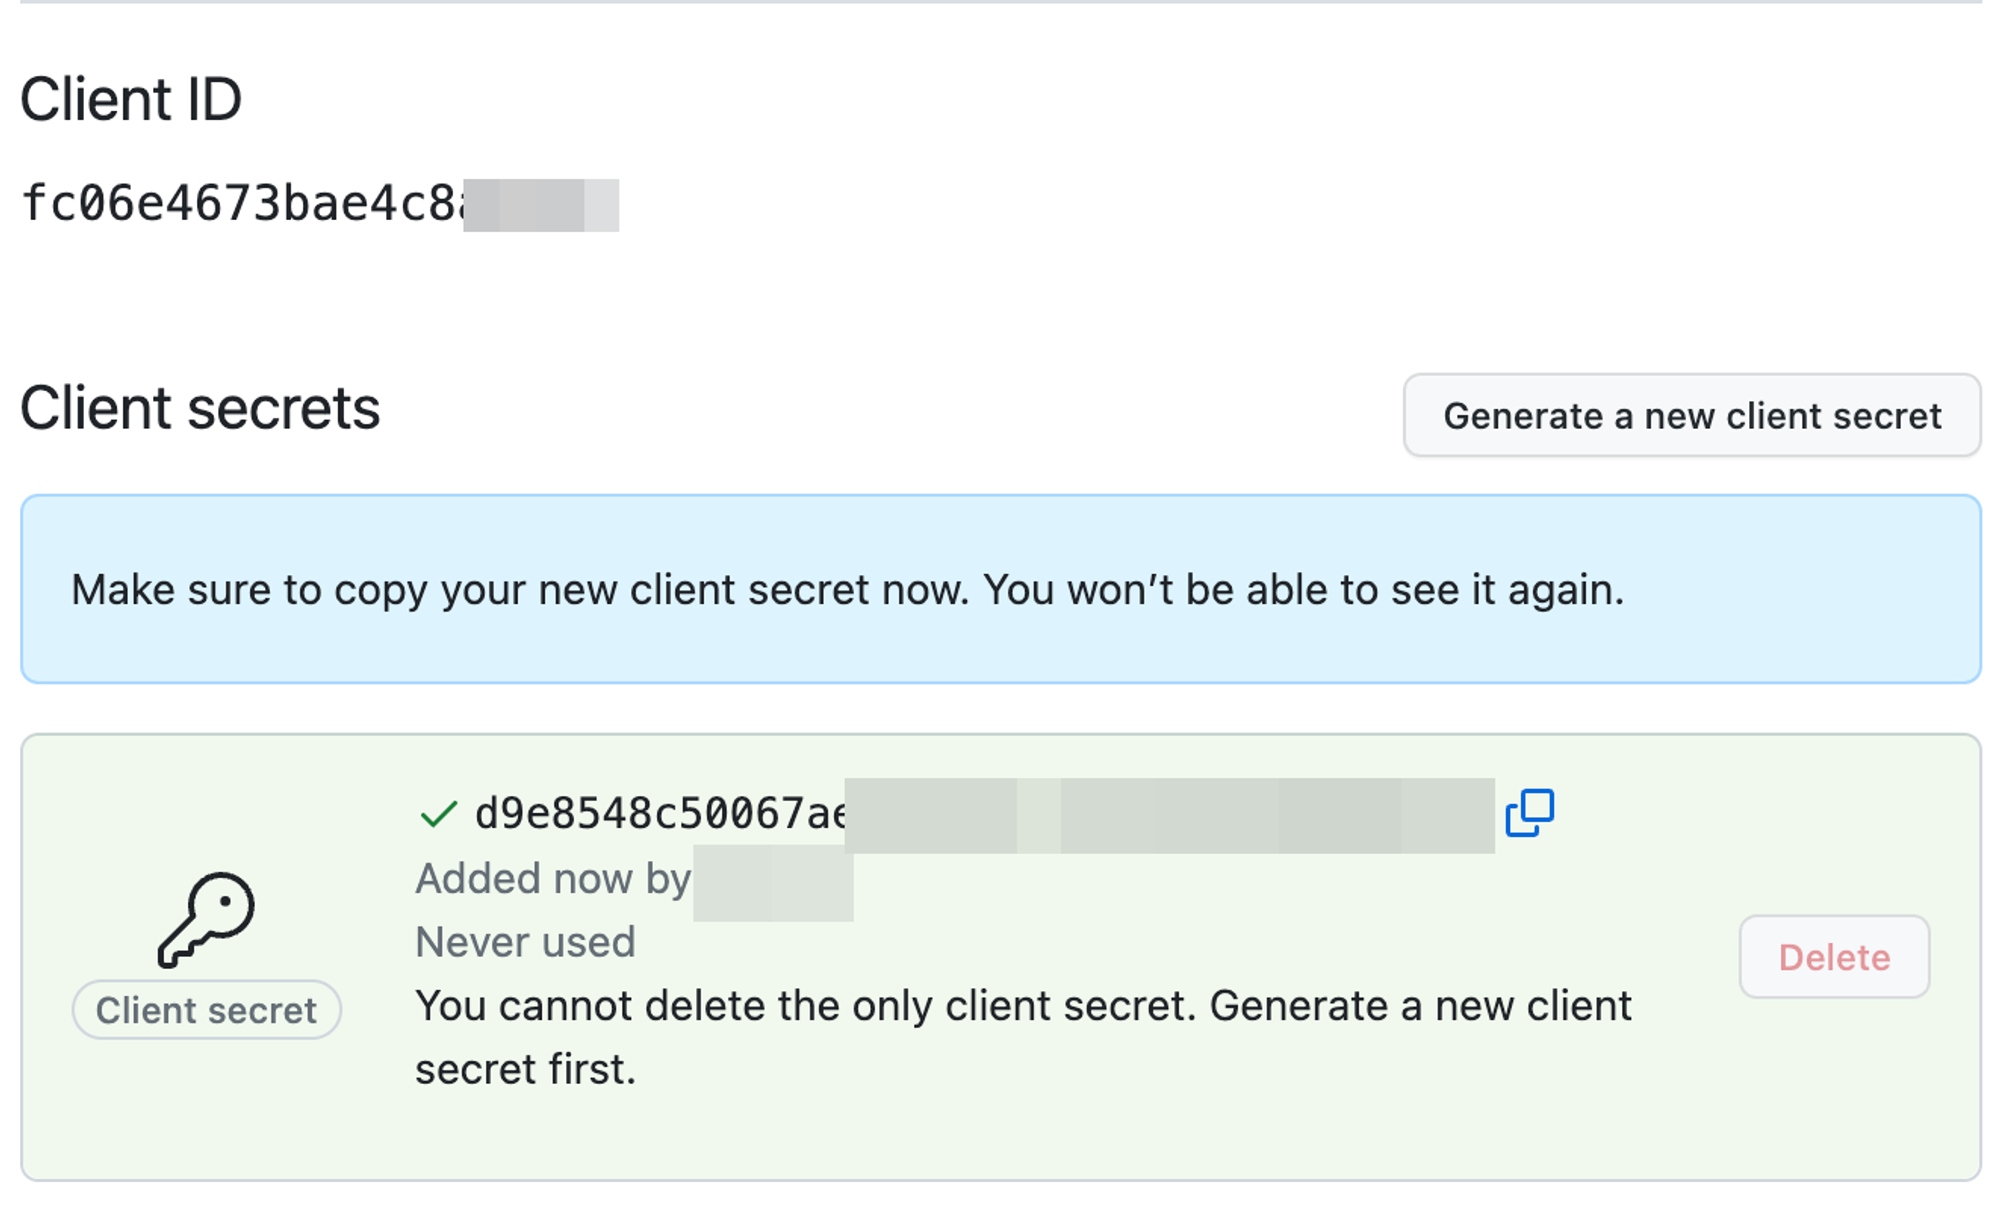
- 点击 “Register application”,然后记录页面中的 Client ID,点击 “Generate a new client secret“,获取一个新的 Client Secret(此 Secret 仅显示一次)。
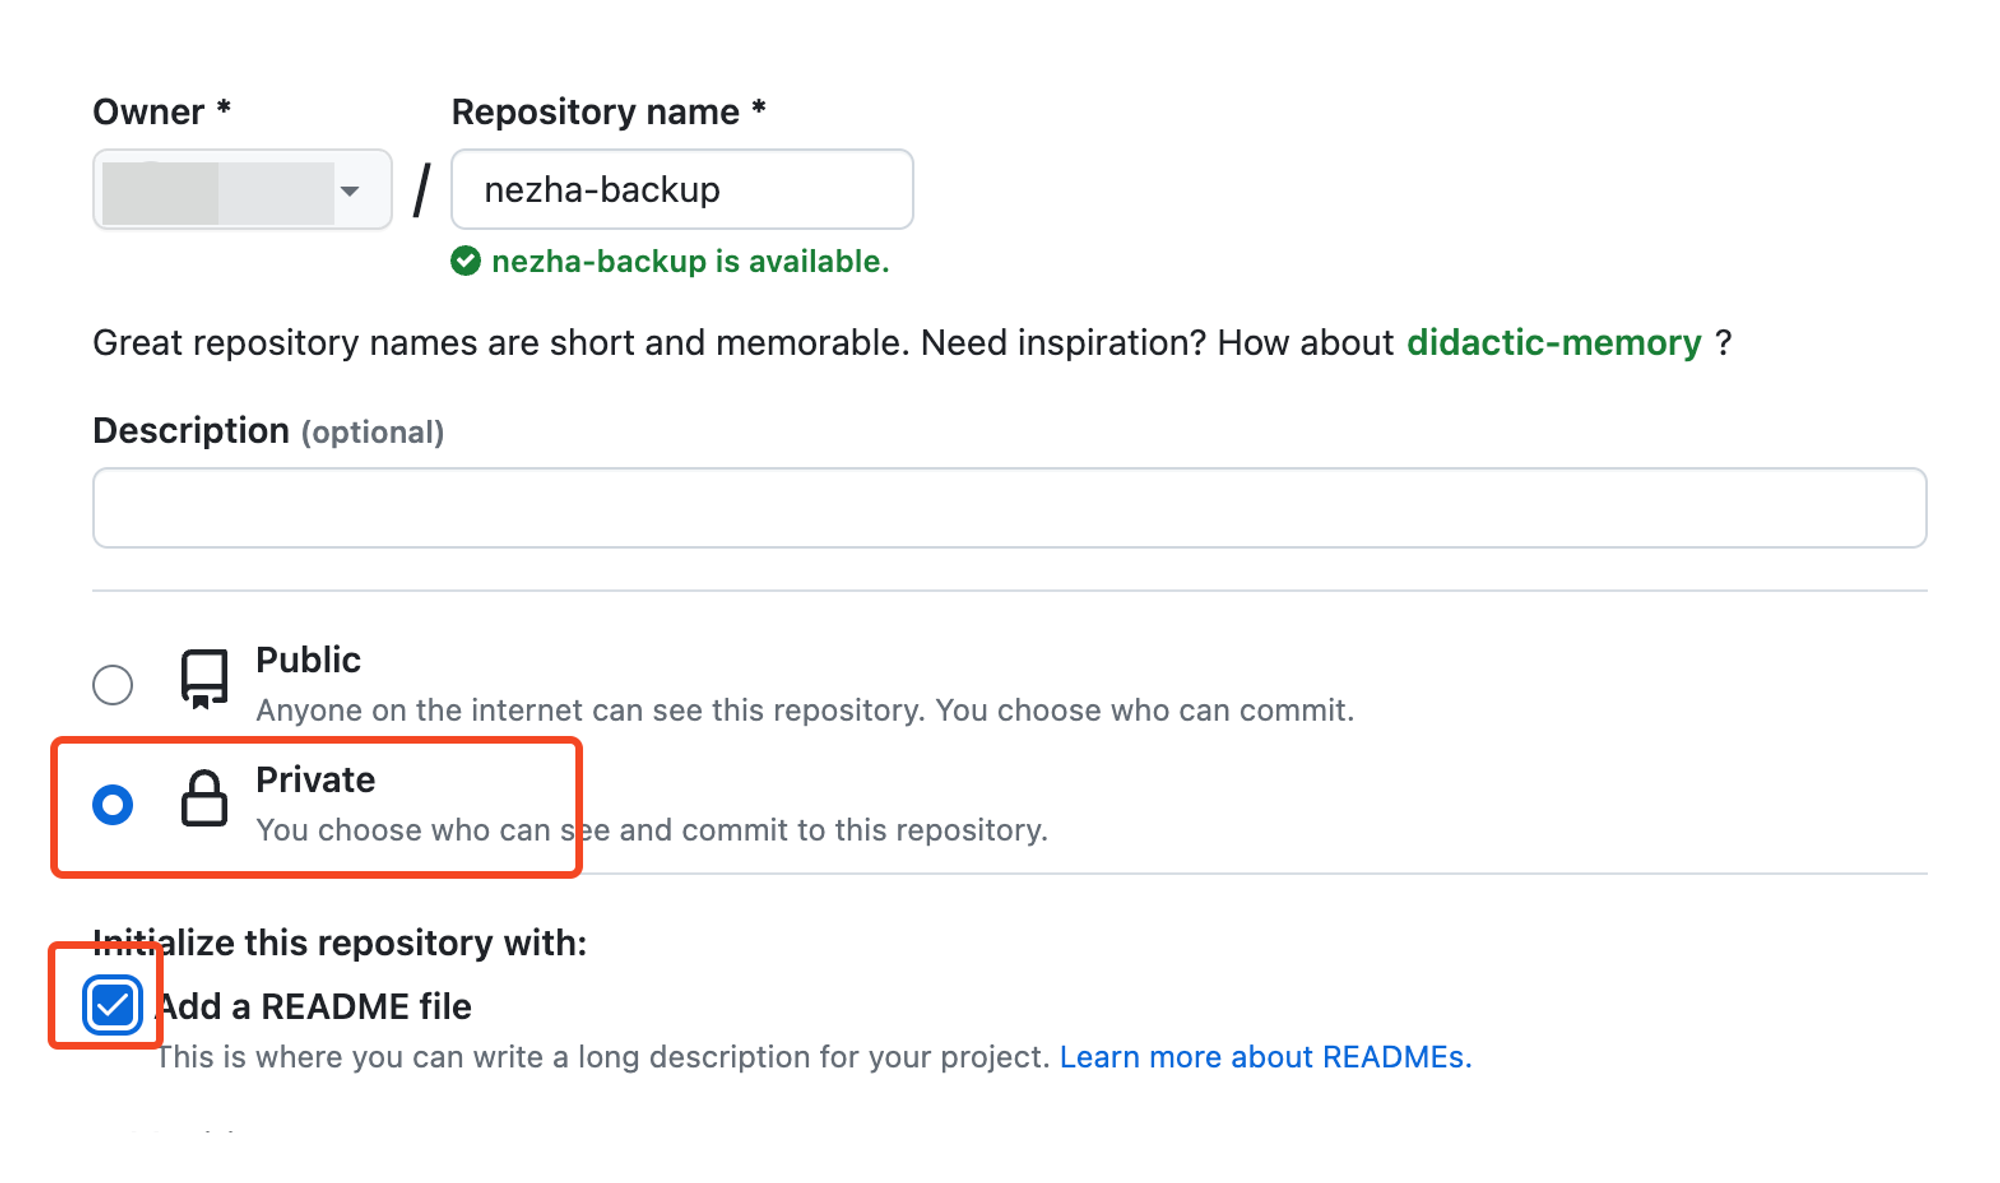
- 创建用于备份的私有仓库:https://github.com/new
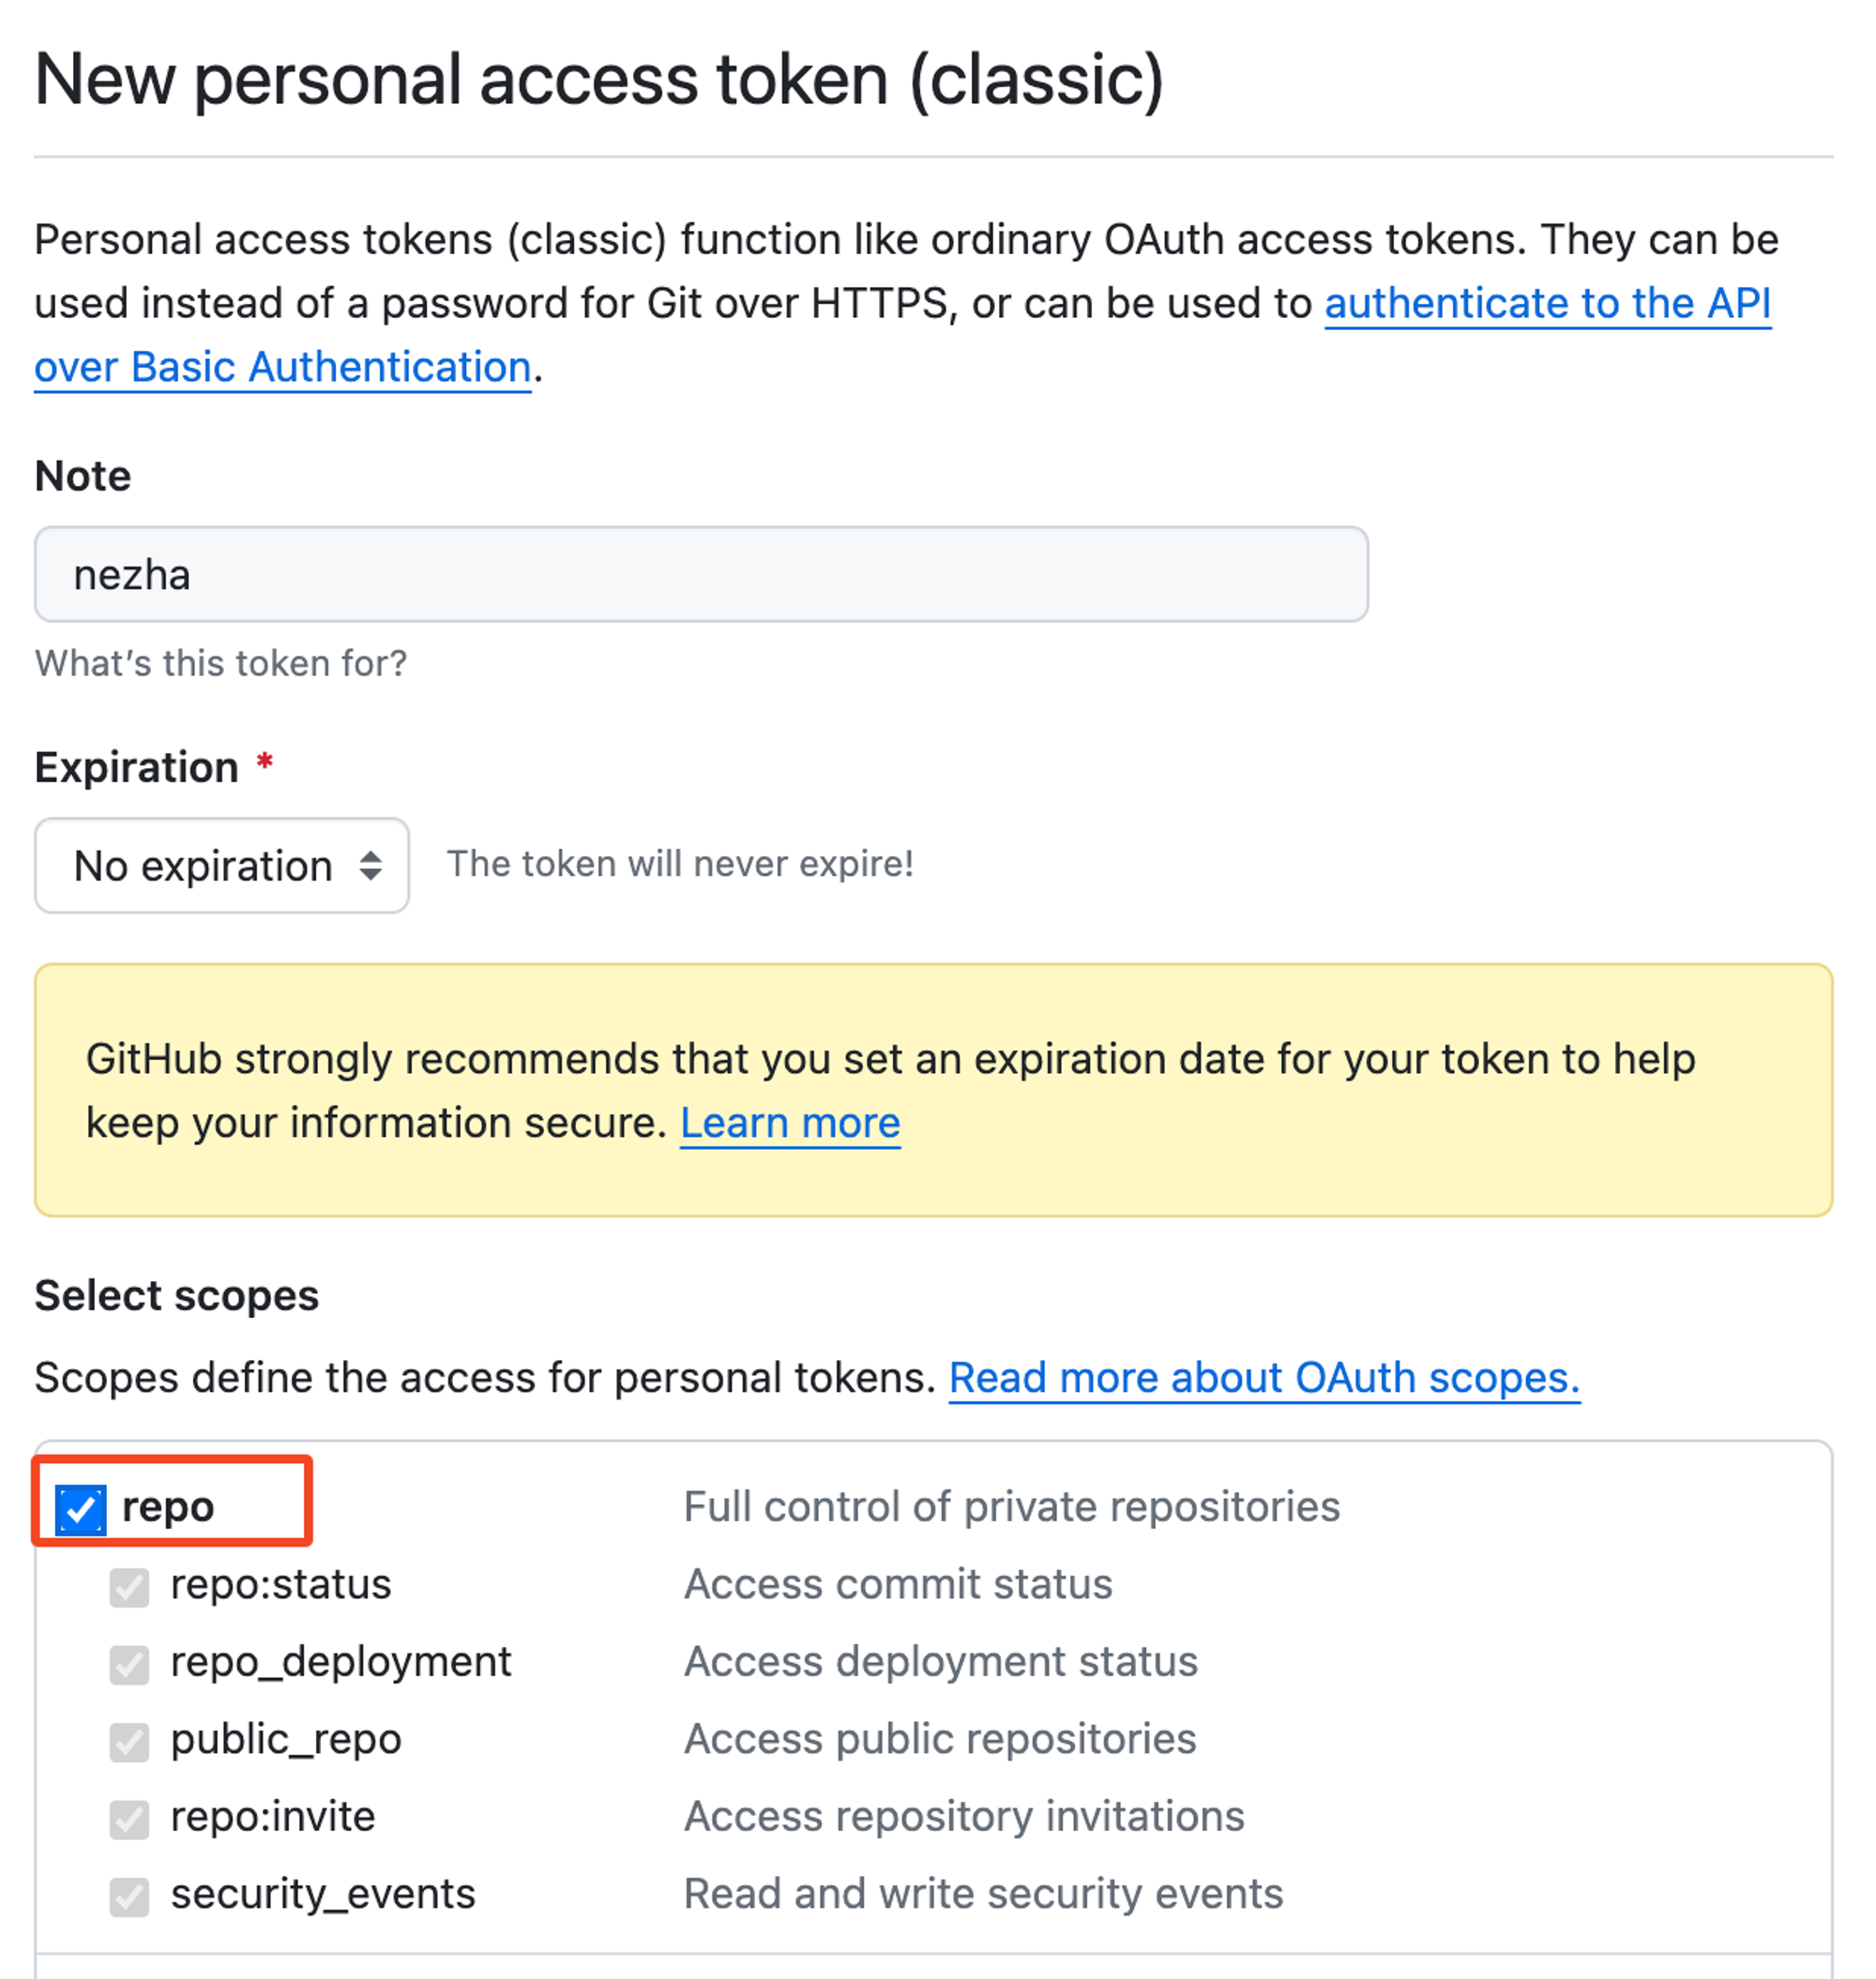
- 创建 GitHub 个人访问凭证(Personal Access Token):https://github.com/settings/tokens/new
- 获取 Argo 隧道 json 信息: https://fscarmen.cloudflare.now.cc
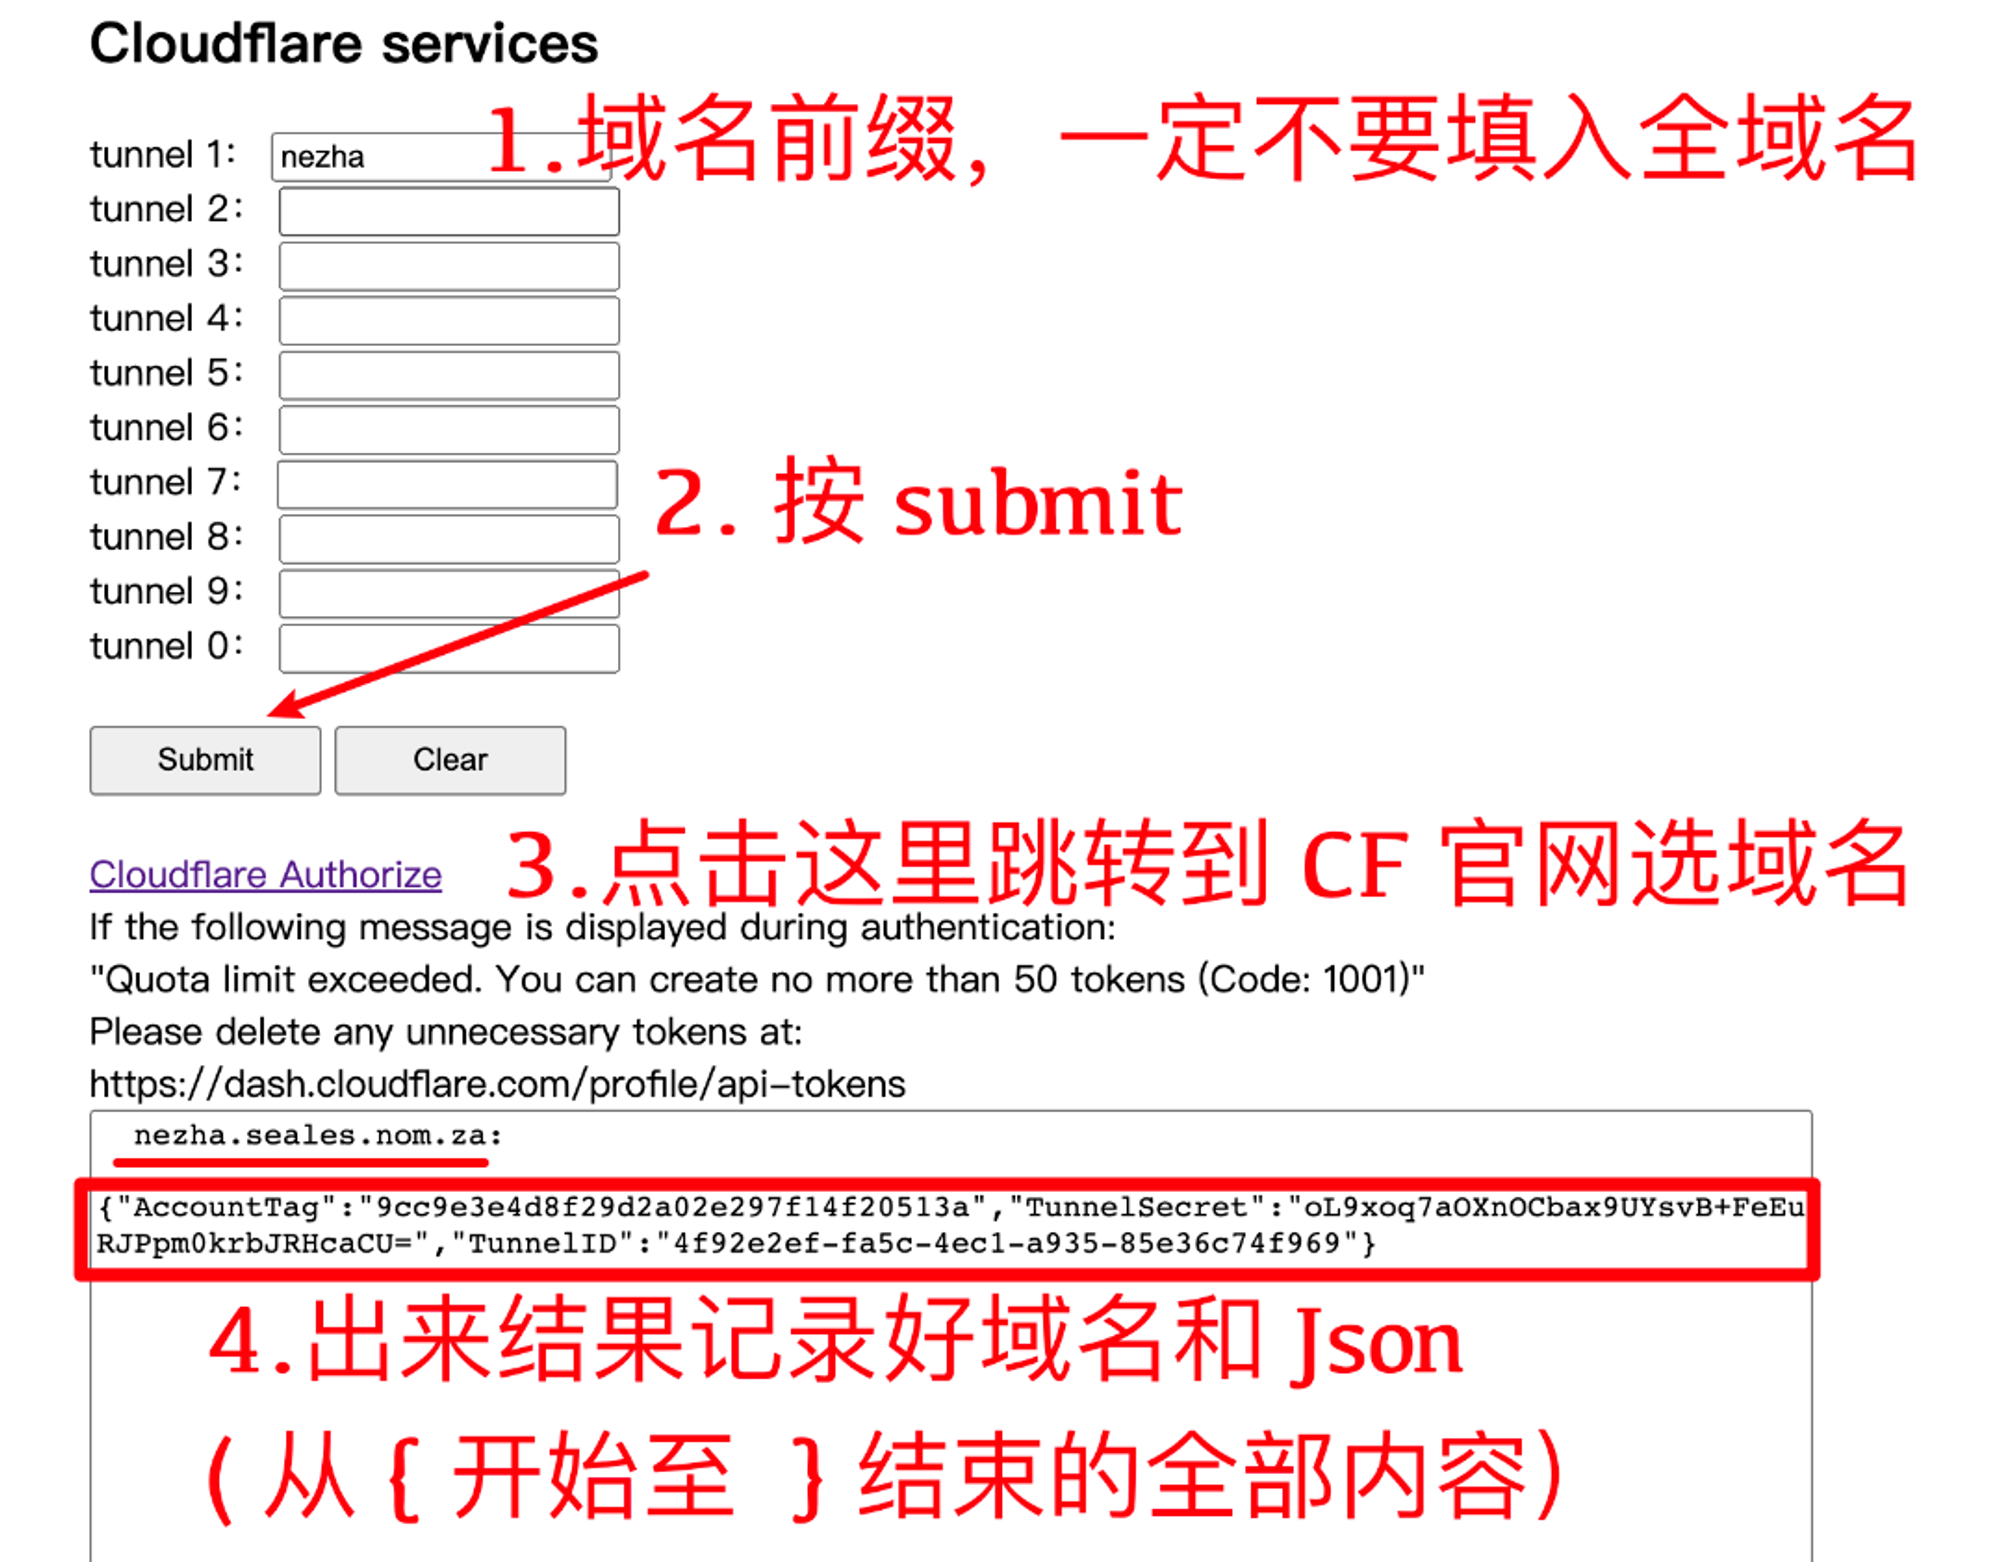
{"AccountTag":"85913ad4a57c652f366daccf2c522ee0","TunnelSecret":"VvpcN639wH08dTdJcJNbcZCGzBNXaE0DP6nyTagJnL4=","TunnelID":"f7583905-d3dd-4ce3-92be-536c438b967f"}
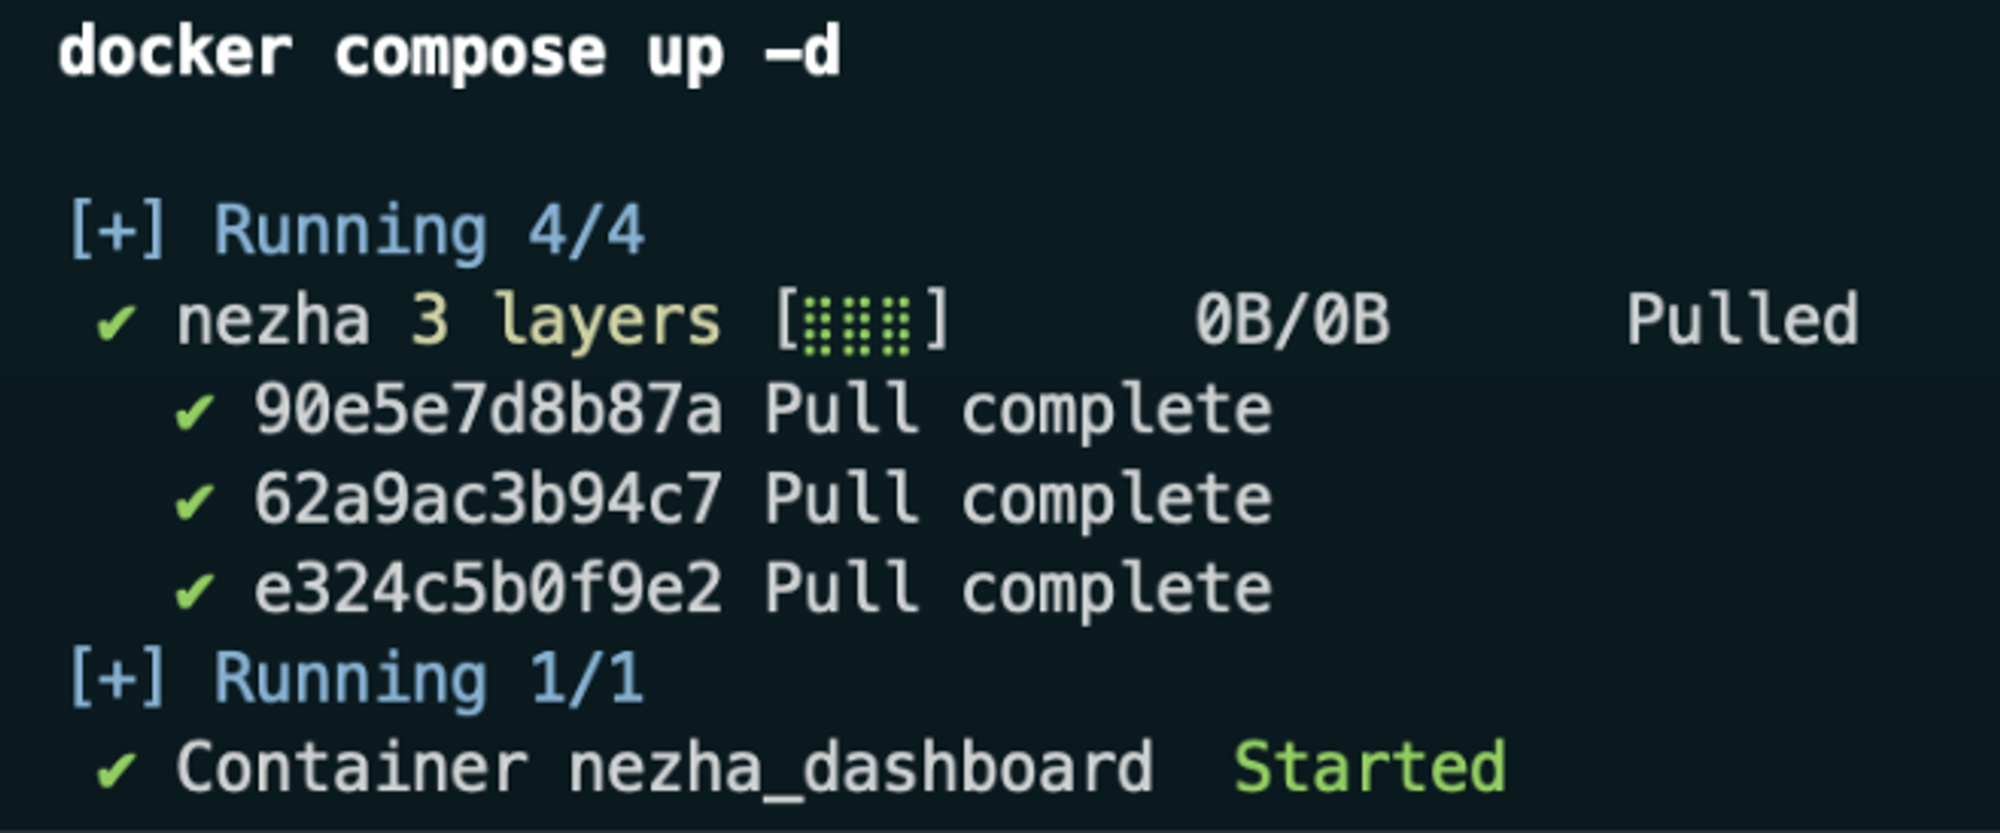
VPS Docker 部署
compose.yamlversion: '3.9' services: nezha: image: fscarmen/argo-nezha container_name: nezha_dashboard restart: always environment: - TZ=Asia/Shanghai - GH_USER=<填 github 用户名> - GH_EMAIL=<<填 github 邮箱> - GH_PAT=<填获取的> - GH_REPO=<填自定义的> - GH_CLIENTID=<填获取的> - GH_CLIENTSECRET=<填获取的> - ARGO_AUTH='<填获取的 Argo json 或者 token>' - ARGO_DOMAIN=<填自定义的隧道域名> - REVERSE_PROXY_MODE=<选填,选填,选填! 如想用 gRPCwebProxy 替代 nginx 反代的话,请设置该变量并赋值为 `grpcwebproxy`>
客户端接入
通过gRPC传输,无需额外配置。
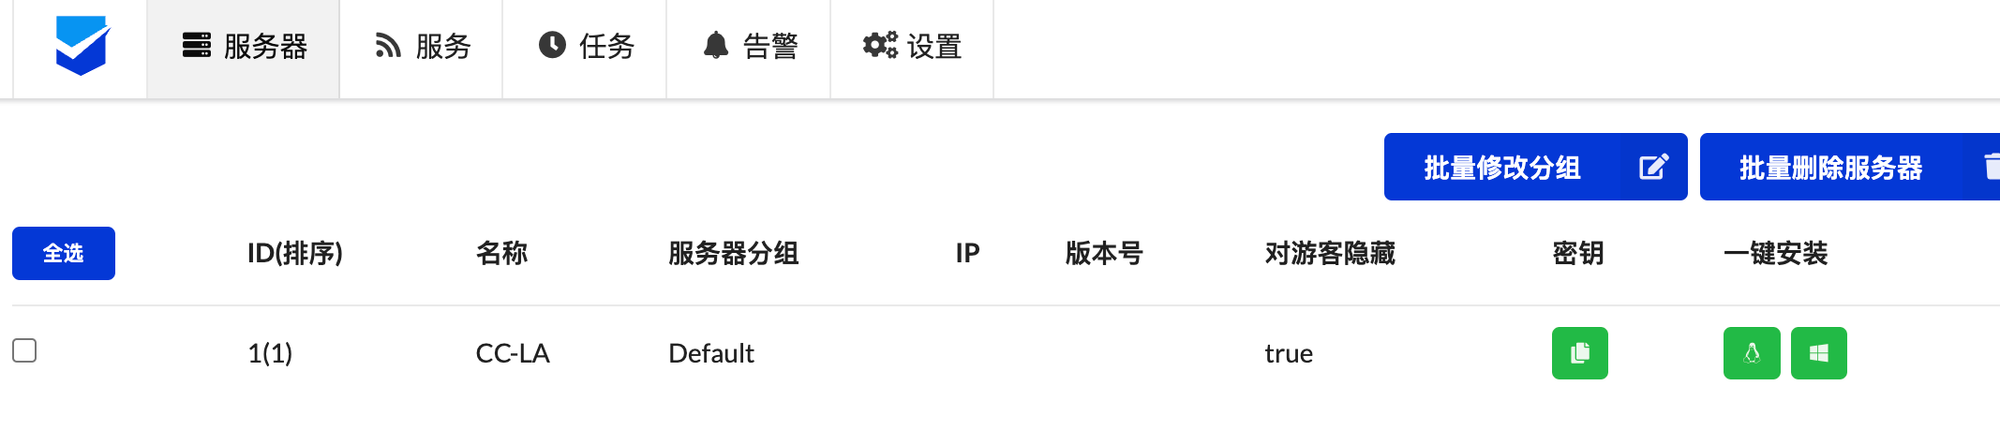
登录监控后台管理,添加服务器,点击页面上的系统图标获得客户端一键安装命令
一般命令类似如下格式:
curl -L https://raw.githubusercontent.com/naiba/nezha/master/script/install.sh -o nezha.sh && chmod +x nezha.sh && sudo ./nezha.sh install_agent nezha.example.com 443 XFrAPR0EKBjBLSDuIzdglgivUMFPDAF8 --tls
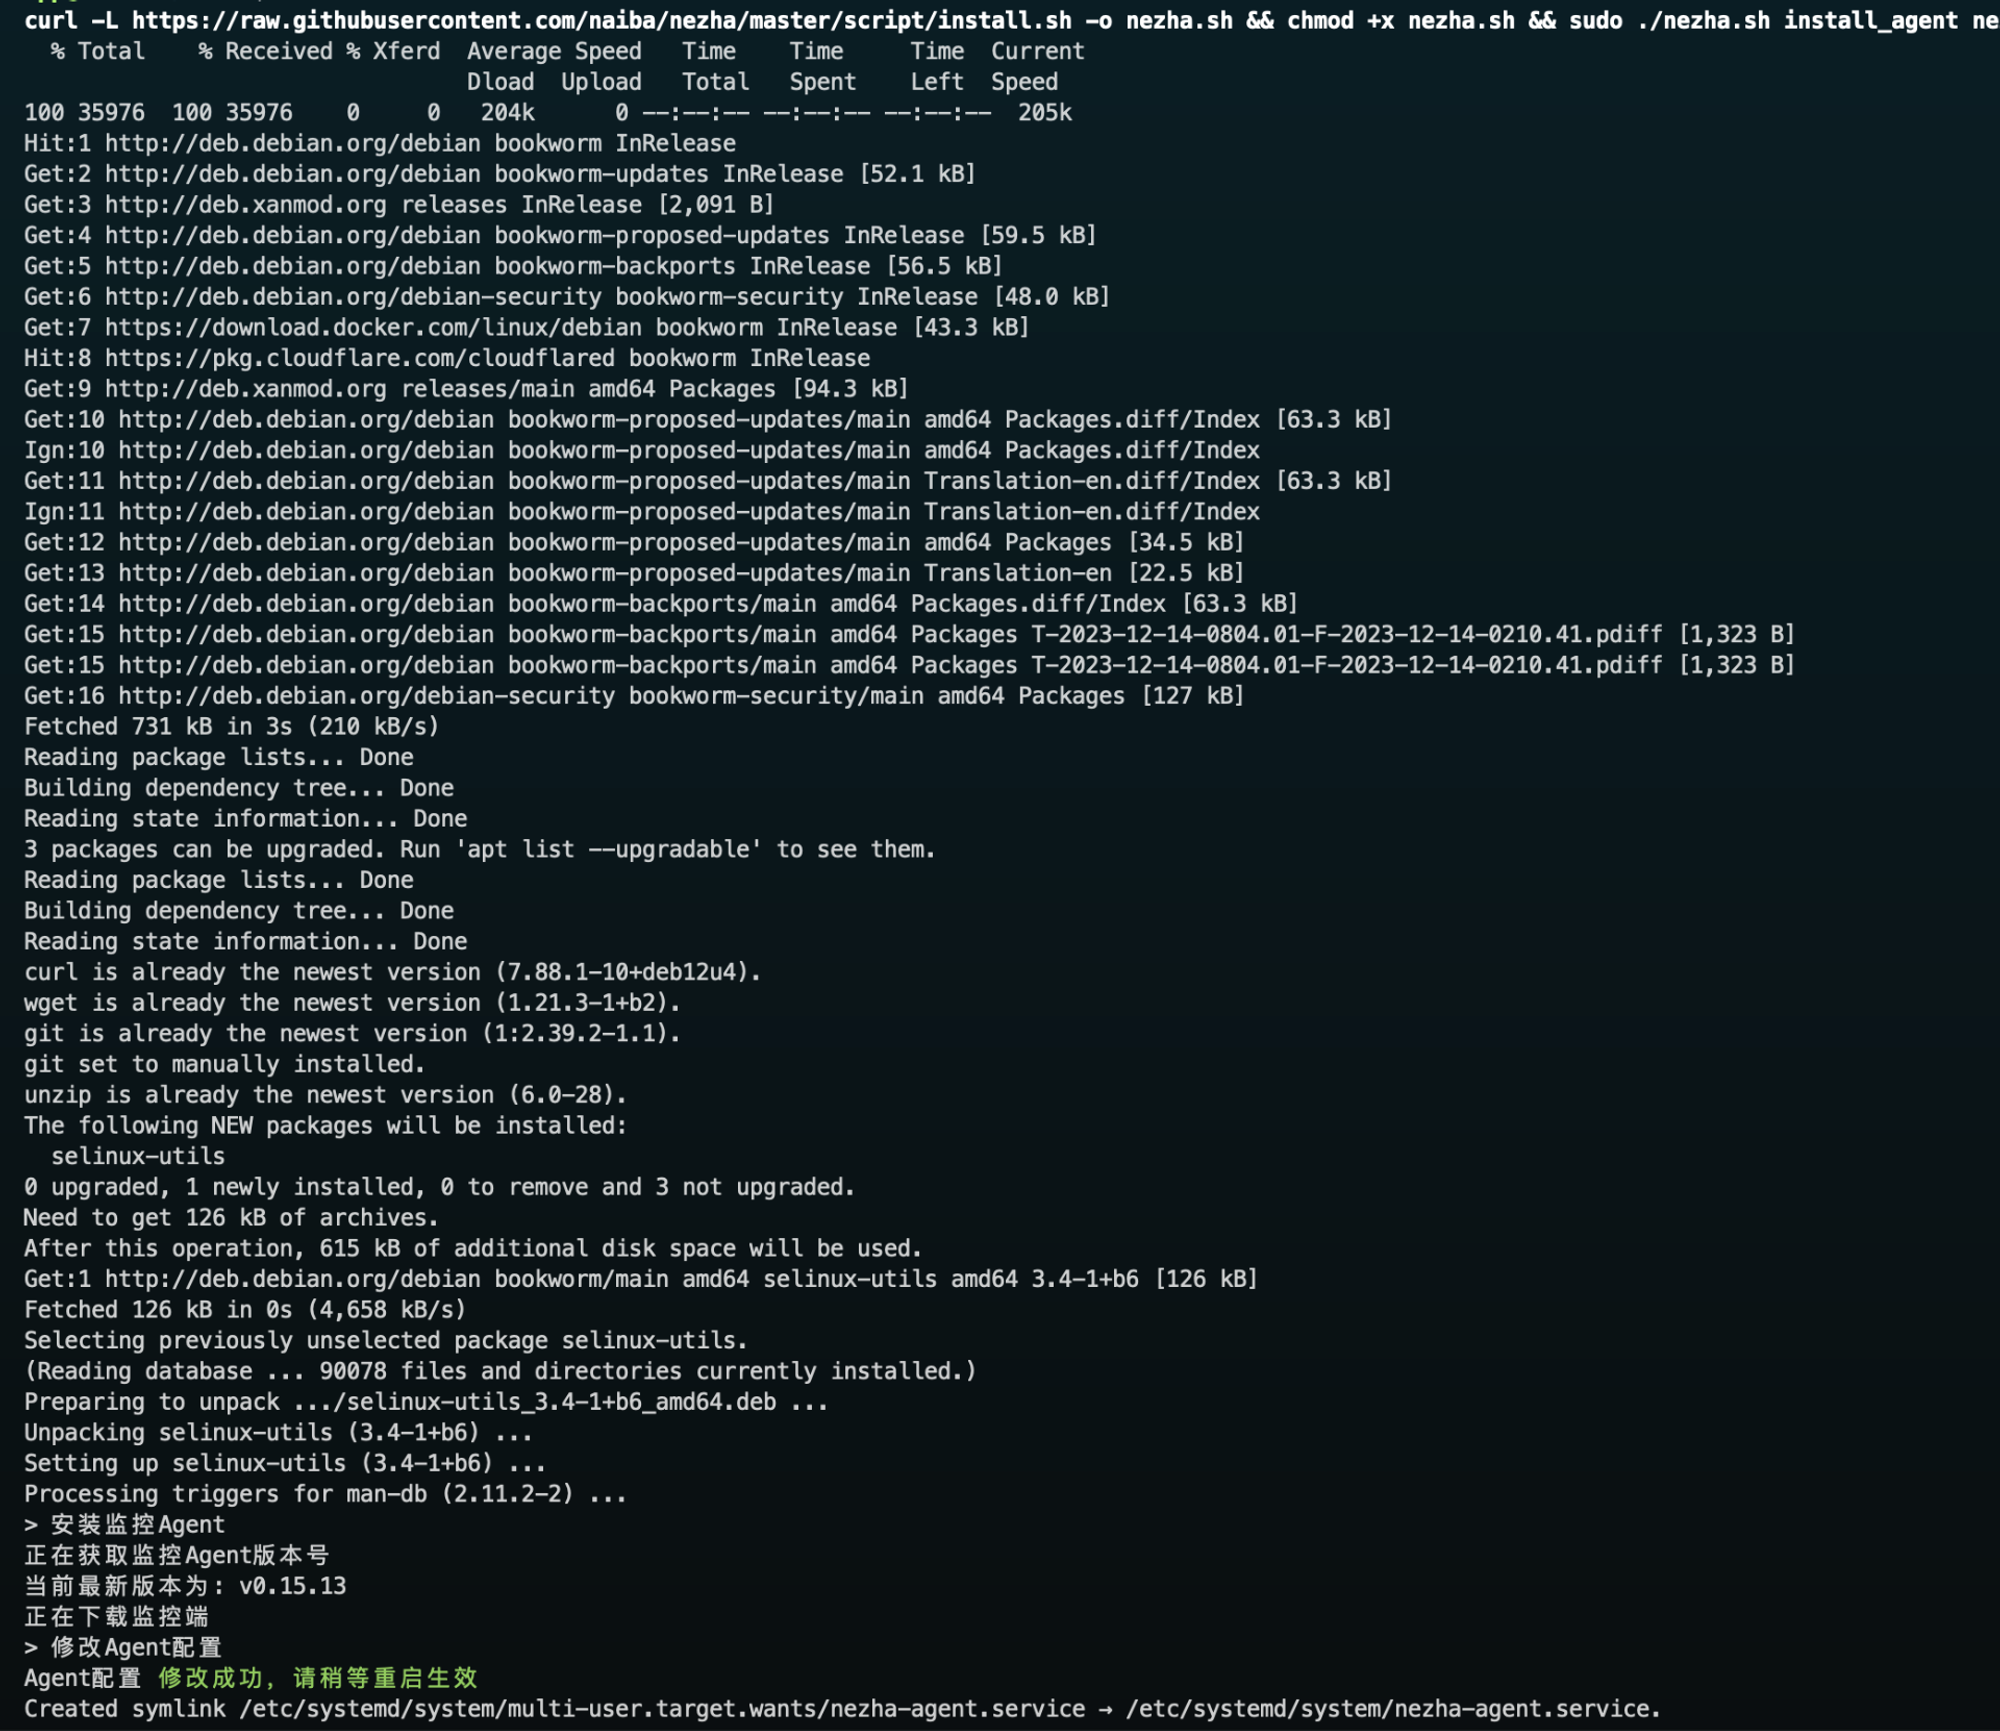
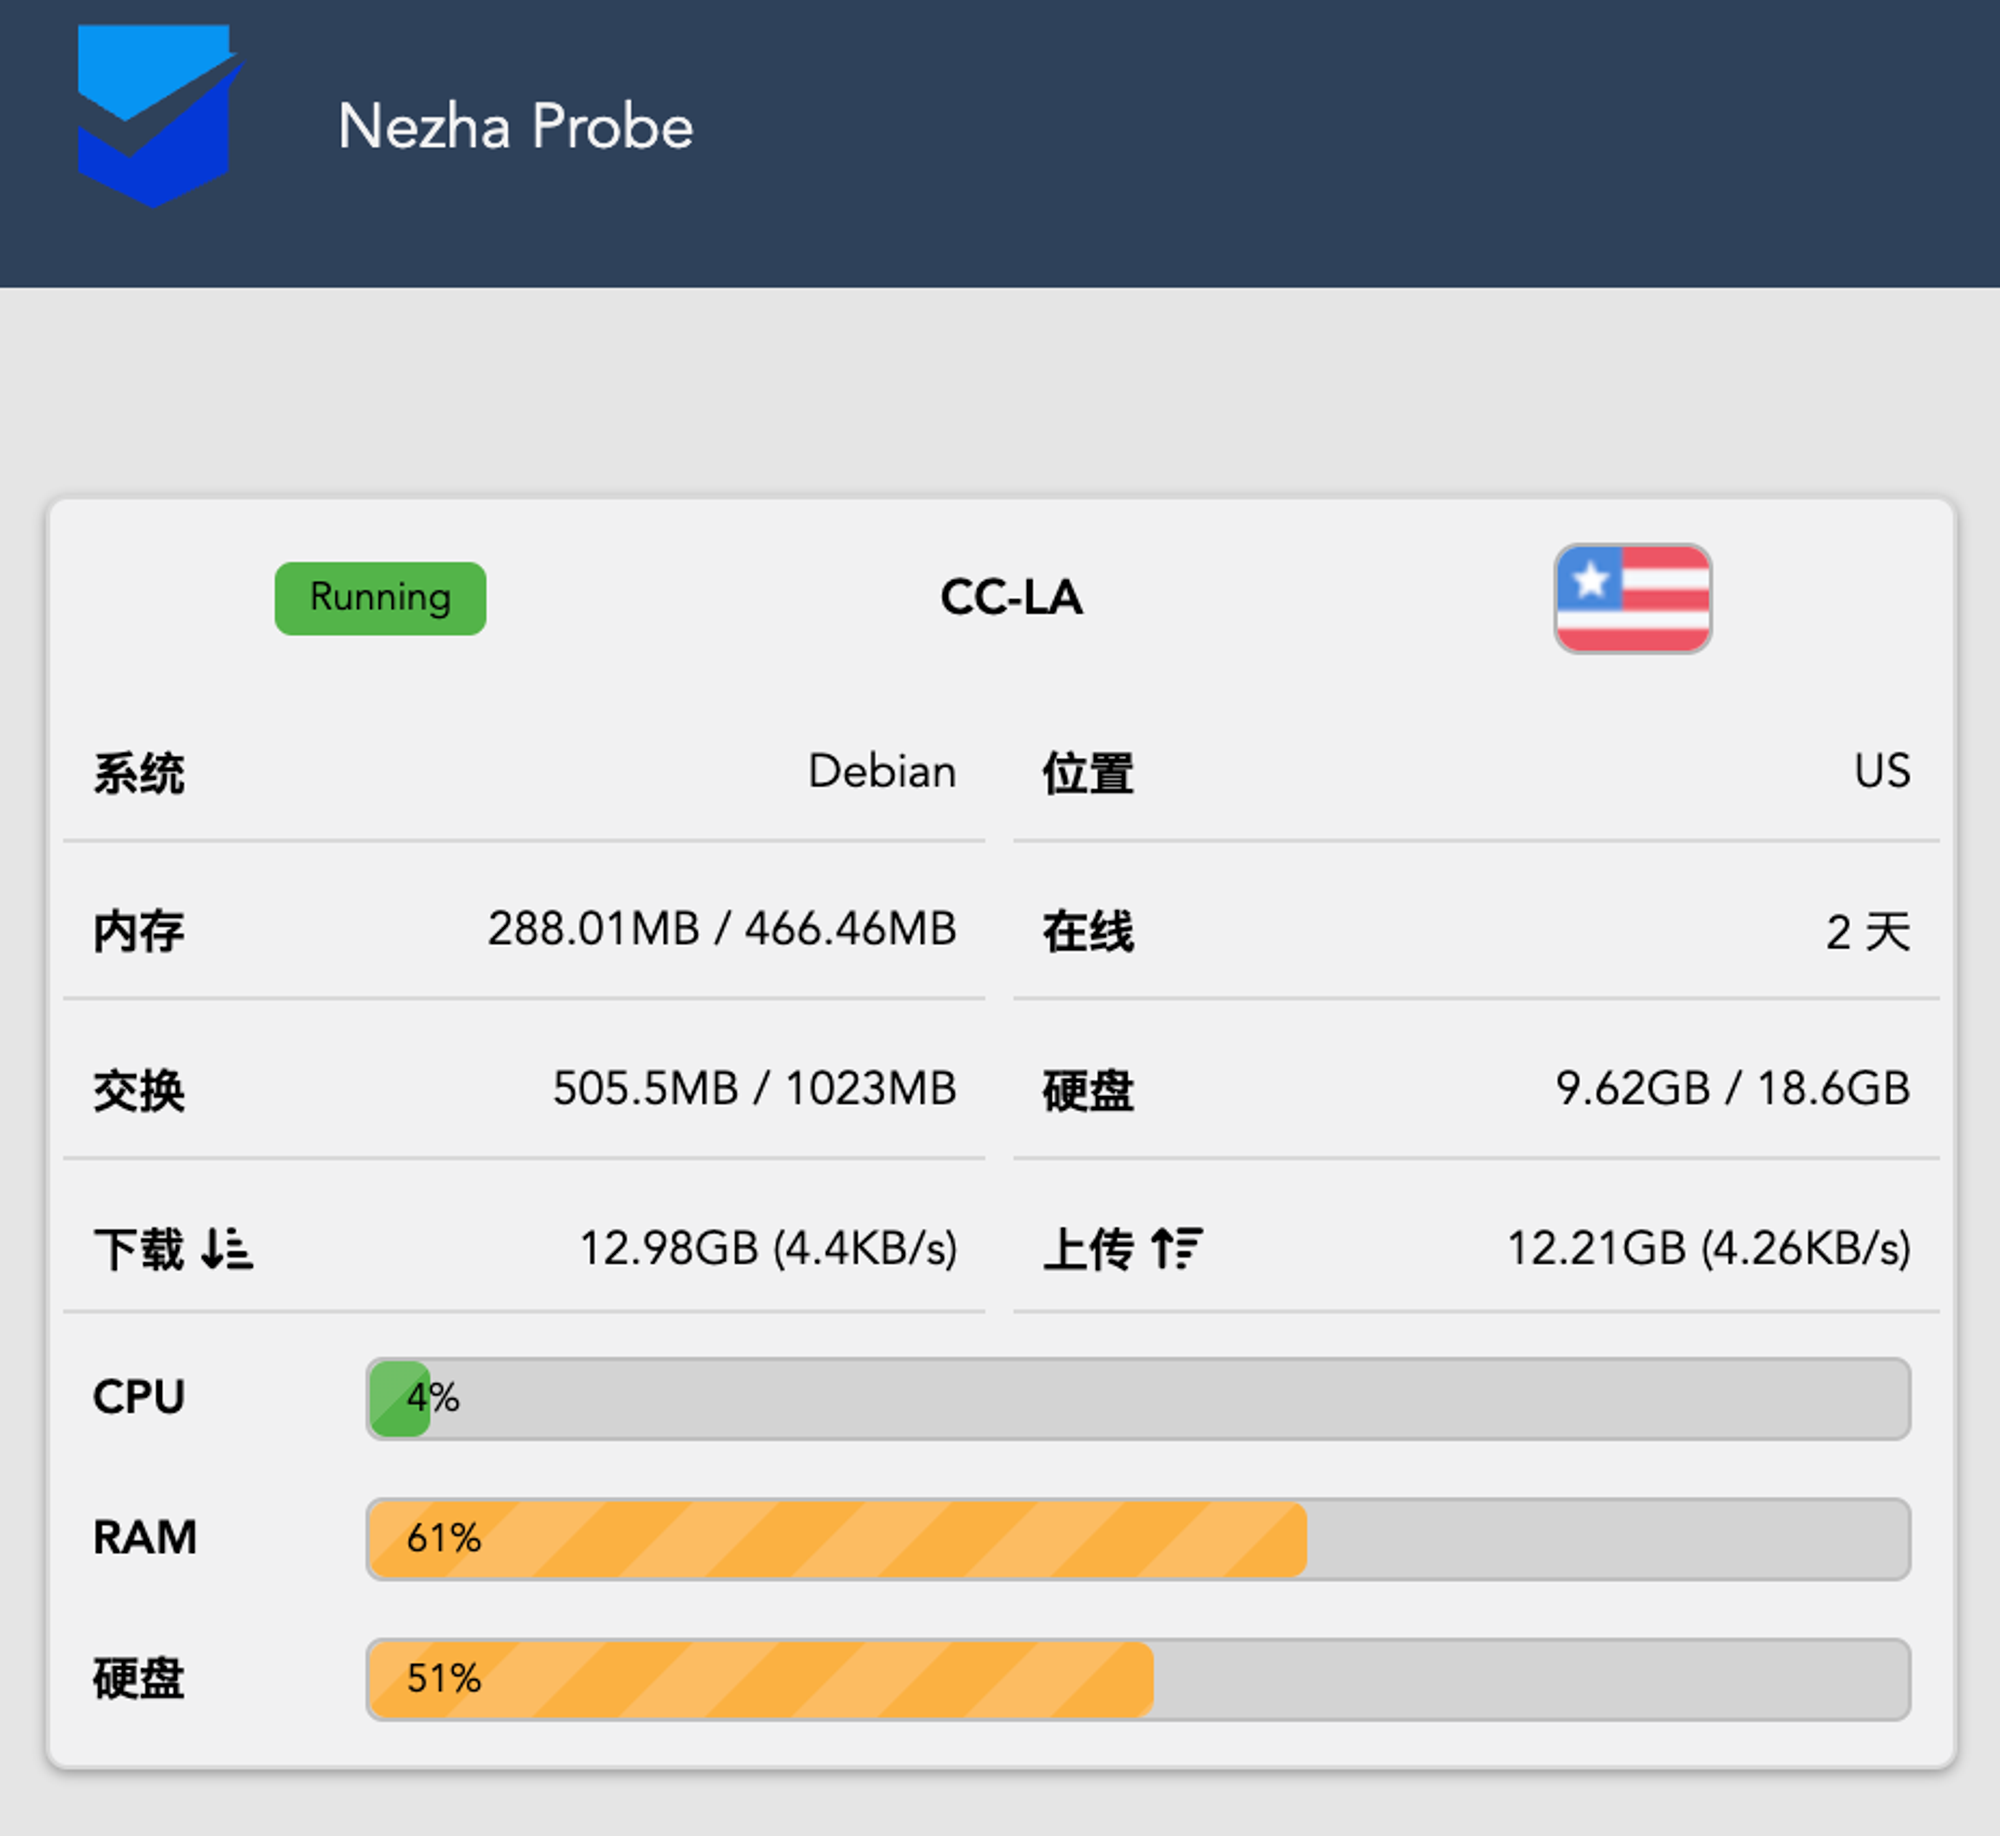
命令执行成功,客户端 Agent 与监控服务端建立连接,此时即可在监控面板首页查看服务器状态了
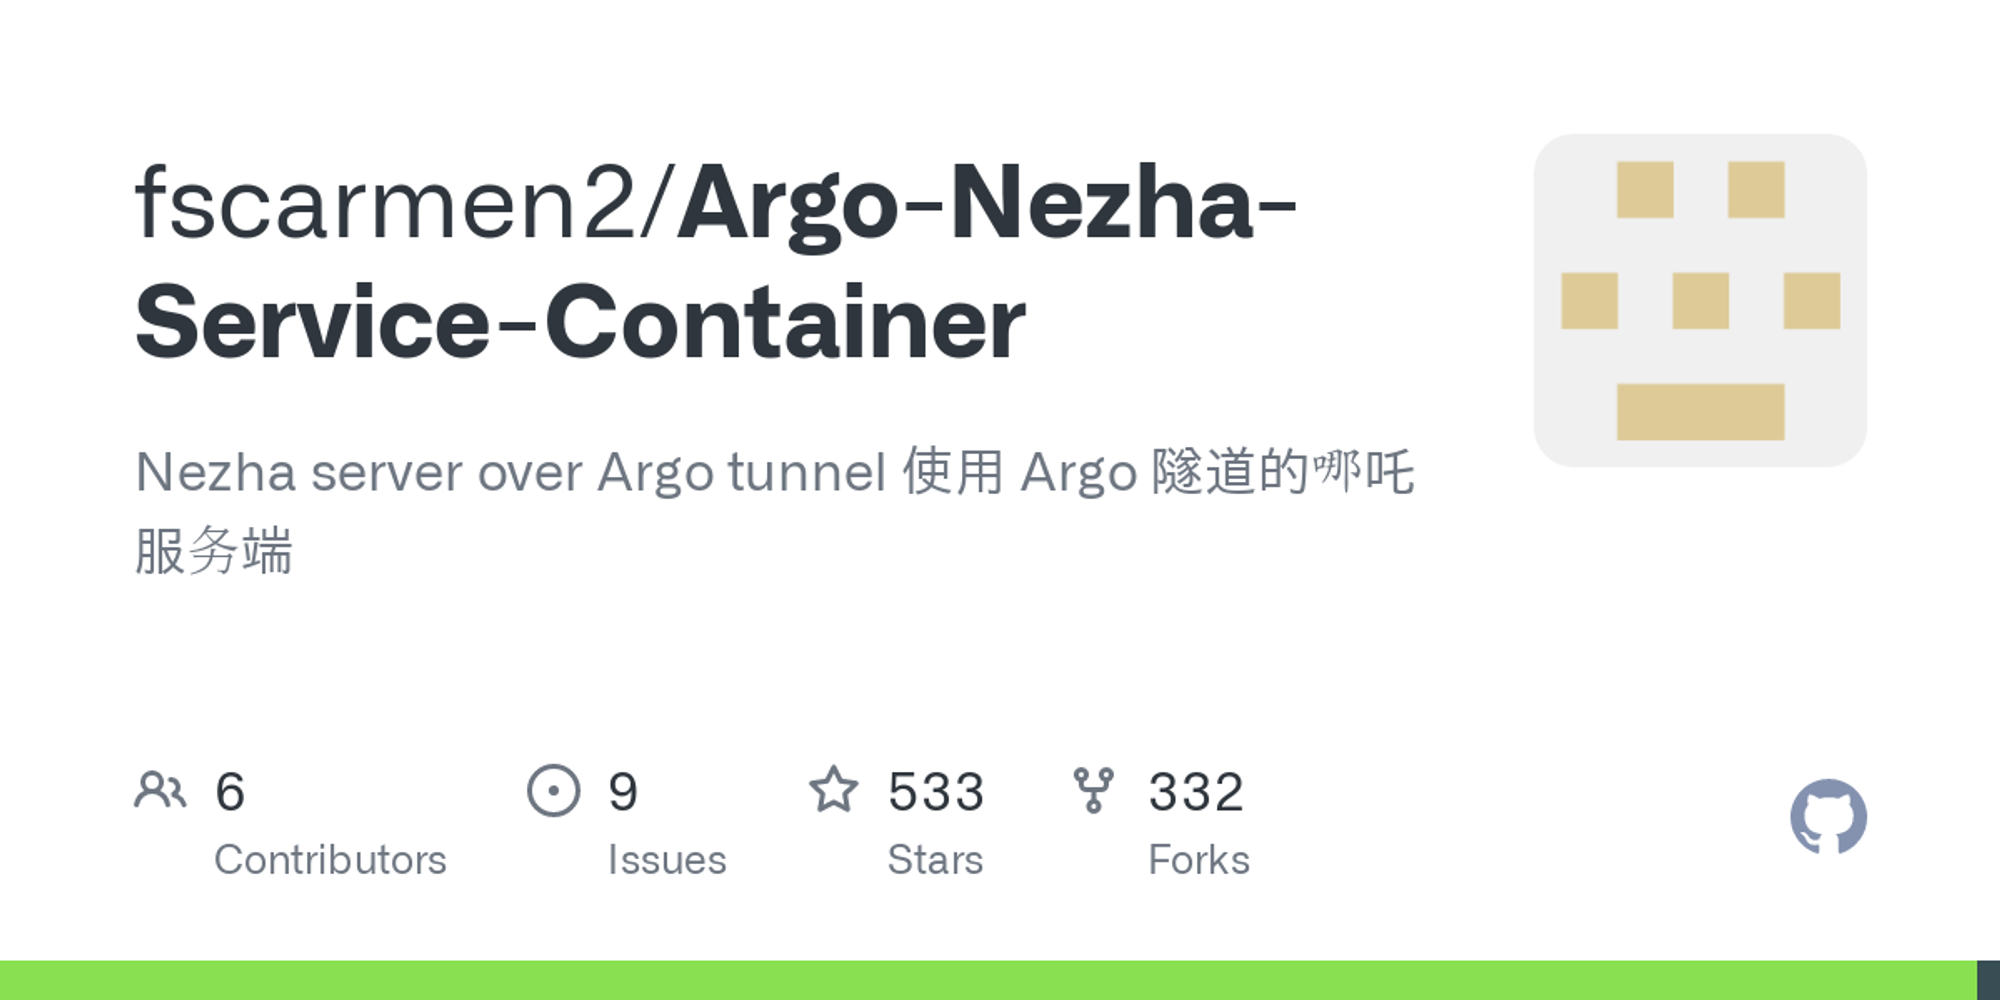
项目来源